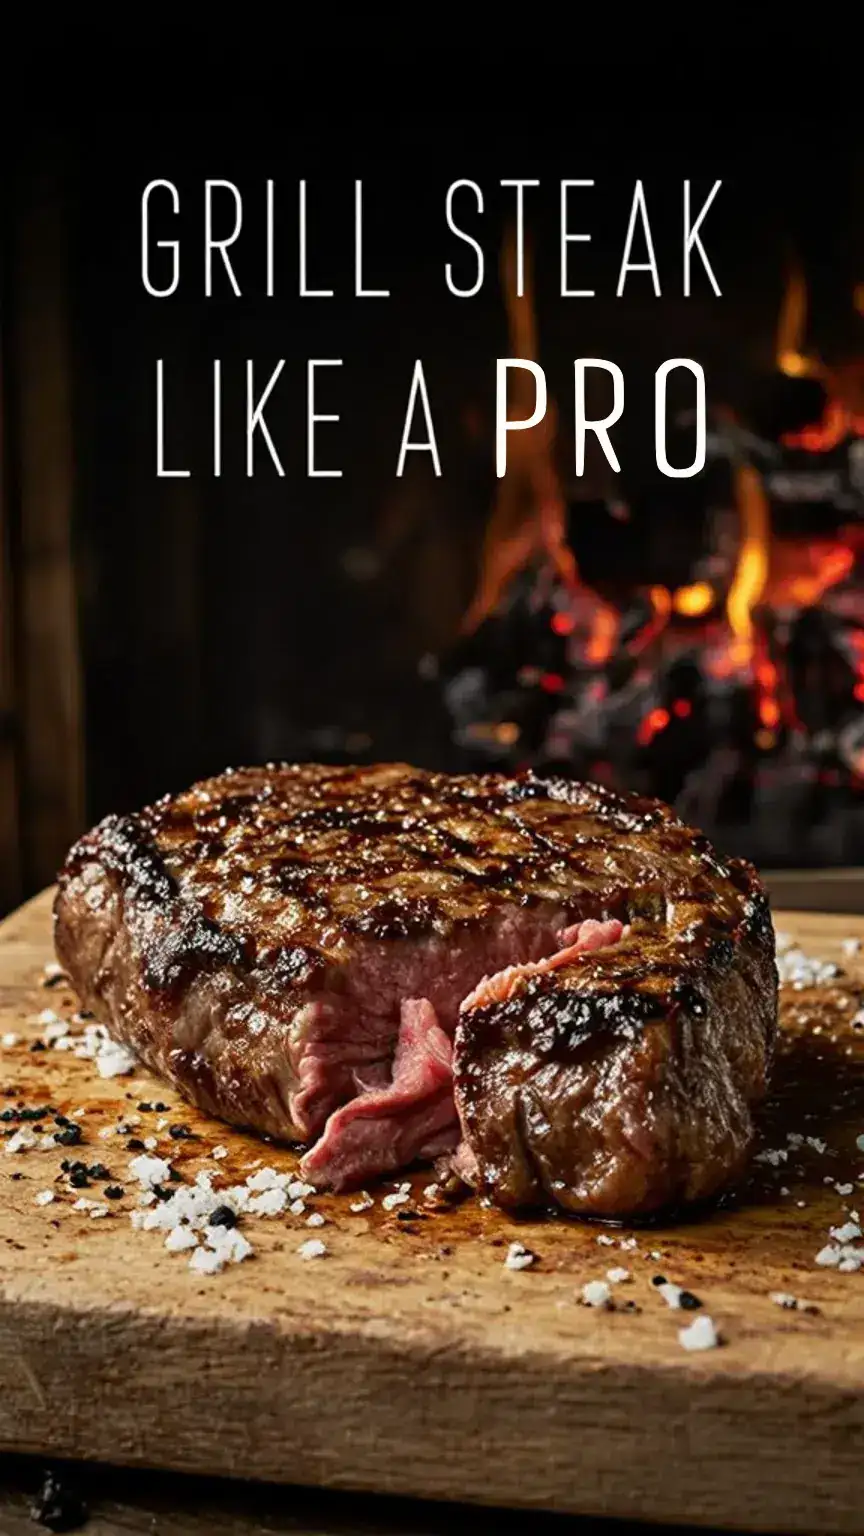
Let’s be honest, fellas. There’s something primal, something deeply satisfying about firing up the grill and turning a beautiful cut of beef into a culinary masterpiece. But for many, the grill can feel less like a playground for flavor and more like a high-stakes battlefield where undercooked or overcooked steak is the enemy. As a guy who’s been there, I’m here to tell you that grilling steak is not just about throwing some meat on the grill and hoping for the best. It’s an art that requires patience, practice, and a few insider tips. But don’t worry, I’ve got you covered. Imagine walking into your backyard gathering, not just with a beer in hand, but with the confidence of a pitmaster, presenting a perfectly grilled steak that elicits gasps of admiration. Your future self will thank you for reading this.
If you’re ready to elevate your grilling game and want to know the secrets to a tender, flavorful steak every time, this mastering the perfect steak guide is for you.
Step 1: Choose the Right Cut of Steak – The Foundation of Flavor

When it comes to grilling steak, the type of cut you choose is crucial. It’s the first domino to fall in a chain reaction of deliciousness. For a truly exceptional grilling experience, look for cuts that are at least 1.5 inches thick. Why this specific thickness, you ask? Well, thicker cuts provide a better canvas for developing that coveted smoky crust while keeping the interior tender and juicy, even when cooked to your desired level of doneness. Think of cuts like a Ribeye, known for its rich marbling and buttery texture, or a robust Strip Loin, offering a great balance of tenderness and beefy flavor. Similarly, a Porterhouse or T-bone, with its iconic bone and two distinct muscles, can also be a showstopper. These cuts have the structural integrity to withstand the high heat of the grill without drying out.
Step 2: Bring the Steak to Room Temperature – The Unsung Hero of Even Cooking
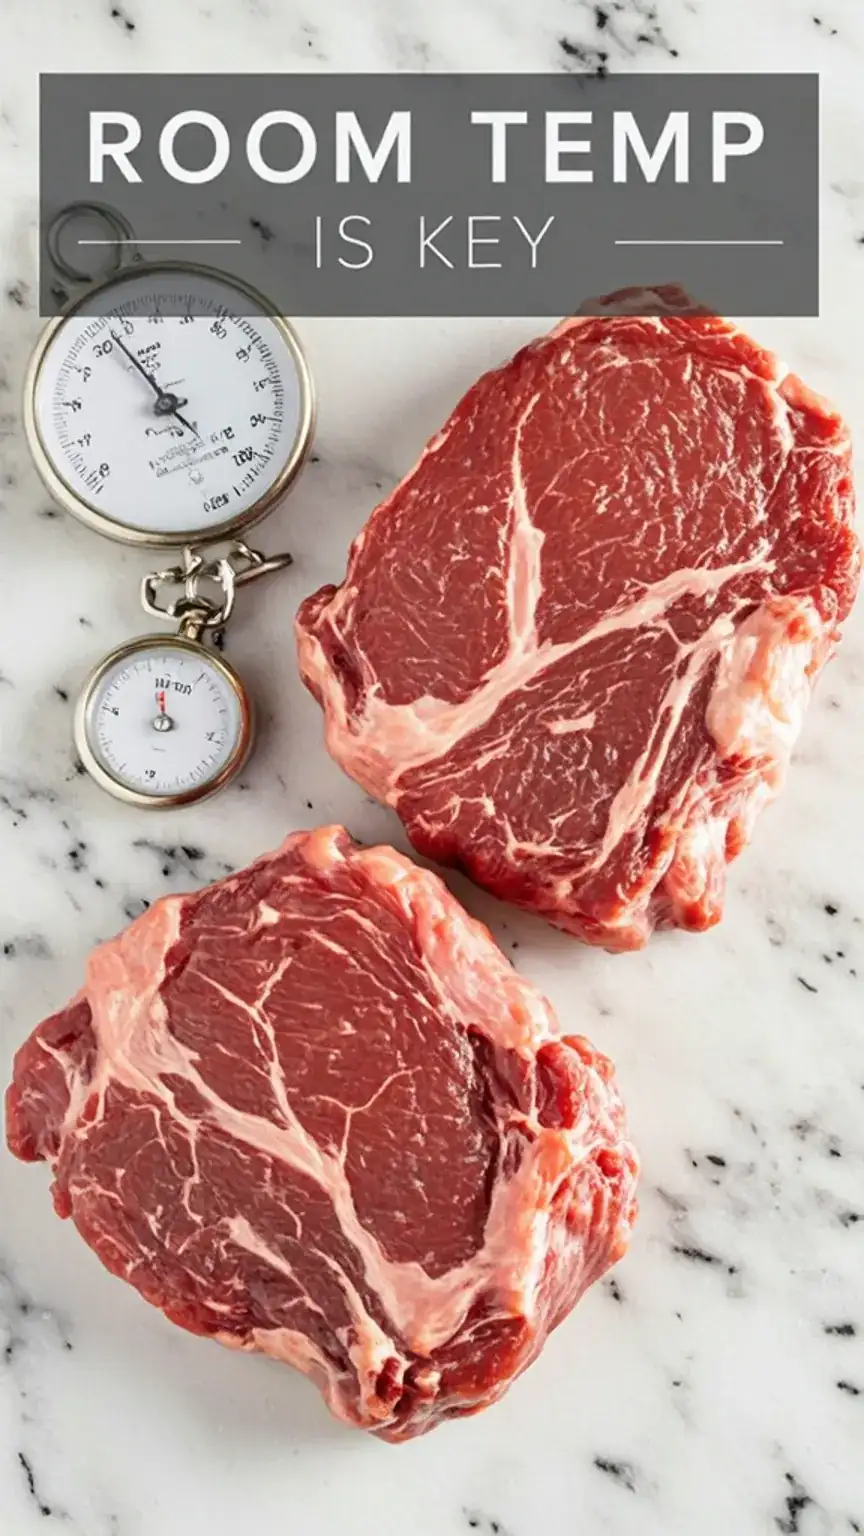
Before you even think about firing up the grill, there’s a critical step that many overlook: bringing your steak to room temperature. This isn’t just a suggestion; it’s a game-changer for achieving perfectly even cooking. Throwing a cold steak, straight from the refrigerator, onto a screaming hot grill is a recipe for disaster. Consequently, the outside will cook much faster than the inside, leaving you with a steak that’s either burnt on the exterior and raw in the center, or frustratingly uneven. To remedy this, simply place your steaks on a plate or rack and let them sit out for about 30-60 minutes before grilling. This allows the meat to temper, ensuring that the heat penetrates evenly from edge to center, resulting in a much more consistent and enjoyable bite.
Step 3: Season the Steak with Salt, Pepper, and Garlic – The Flavor Symphony
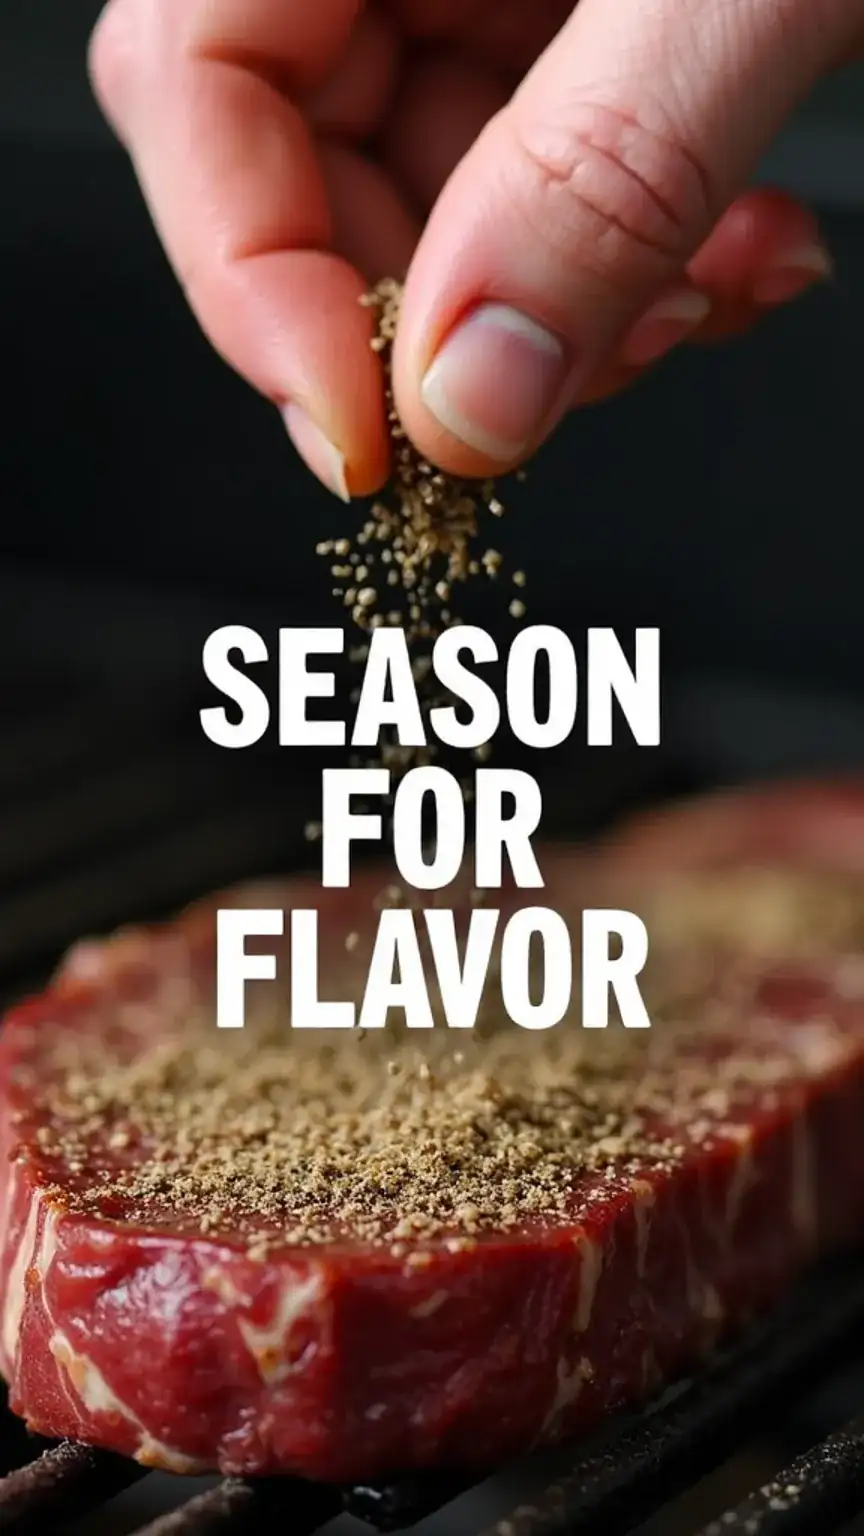
Now, let’s talk about seasoning. While a great cut of steak is important, the right seasoning can elevate it from good to absolutely unforgettable. Seasoning the steak generously with coarse salt, freshly cracked black pepper, and garlic powder is a classic combination for a reason. Not only will it add depth and complexity to the flavor profile, but it also plays a crucial role in developing that beautiful, savory crust we all crave. The salt helps to draw out moisture, which then reabsorbs into the meat, tenderizing it and creating a more robust flavor. Furthermore, the pepper and garlic provide aromatic notes that complement the richness of the beef. Don’t be shy with the seasoning; a good crust requires a good foundation.
Step 4: Grill the Steak to Perfection – Mastering the Heat and Time
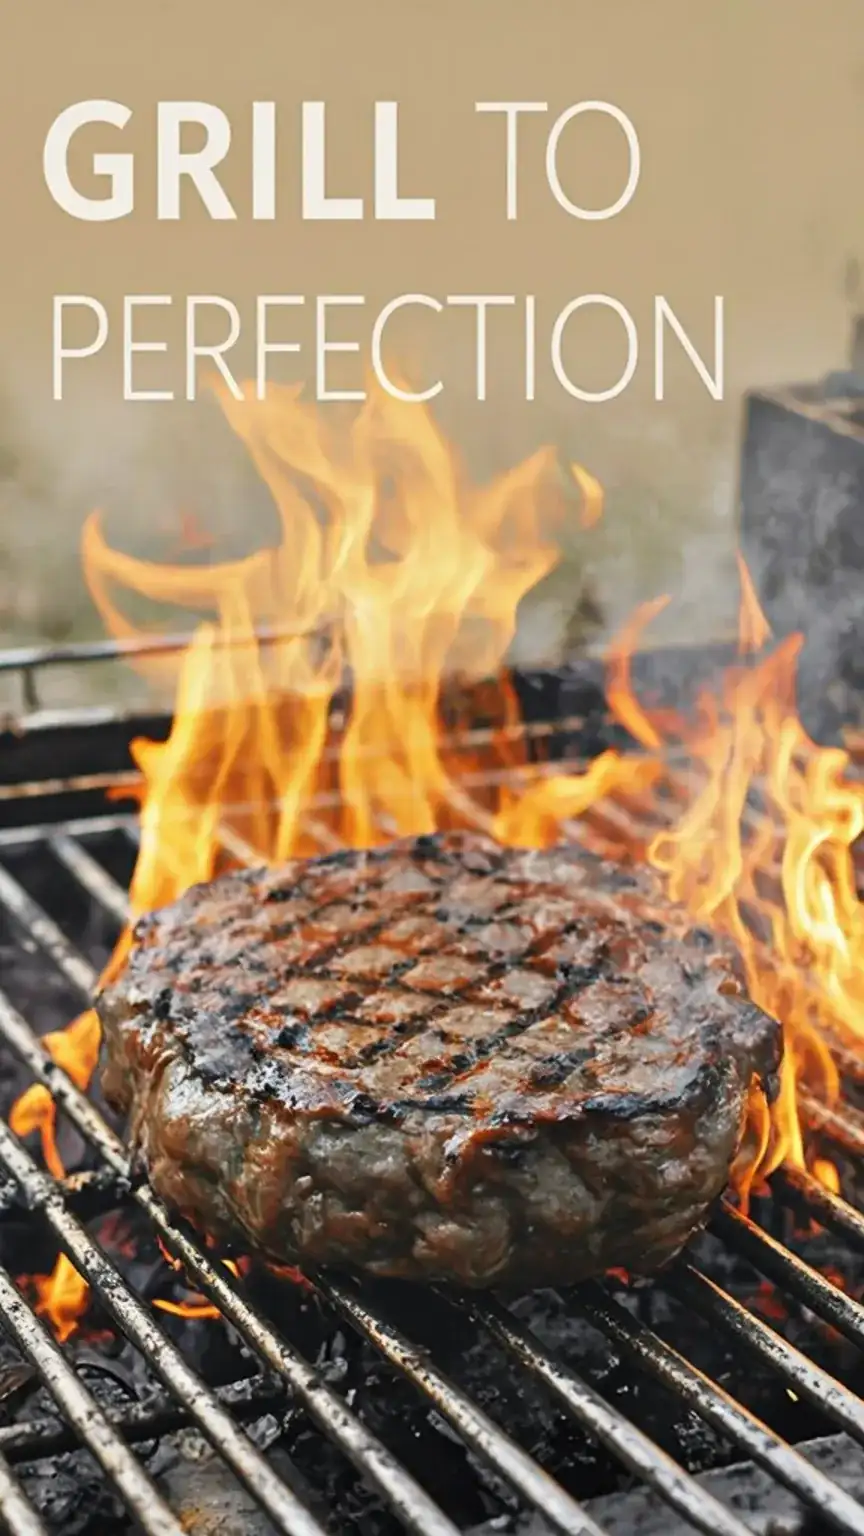
This is where the magic happens. Now it’s time to fire up the grill. For that perfect char and even cooking, preheat your grill to medium-high heat. Aim for a temperature around 450-500°F (230-260°C). Once your grill is adequately hot, place the seasoned steaks directly on the grates. For a 1.5-inch thick steak, a good starting point is to cook it for about 4-5 minutes per side for medium-rare. However, the most reliable way to gauge doneness is by using a meat thermometer. Insert it into the thickest part of the steak, avoiding bone or fat. For medium-rare, aim for an internal temperature of 130-135°F (54-57°C). Medium will be around 140-145°F (60-63°C), and medium-well will be 150-155°F (65-68°C). Remember, the temperature will rise a few more degrees as the steak rests.
Step 5: Let the Steak Rest – The Crucial Moment of Juiciness
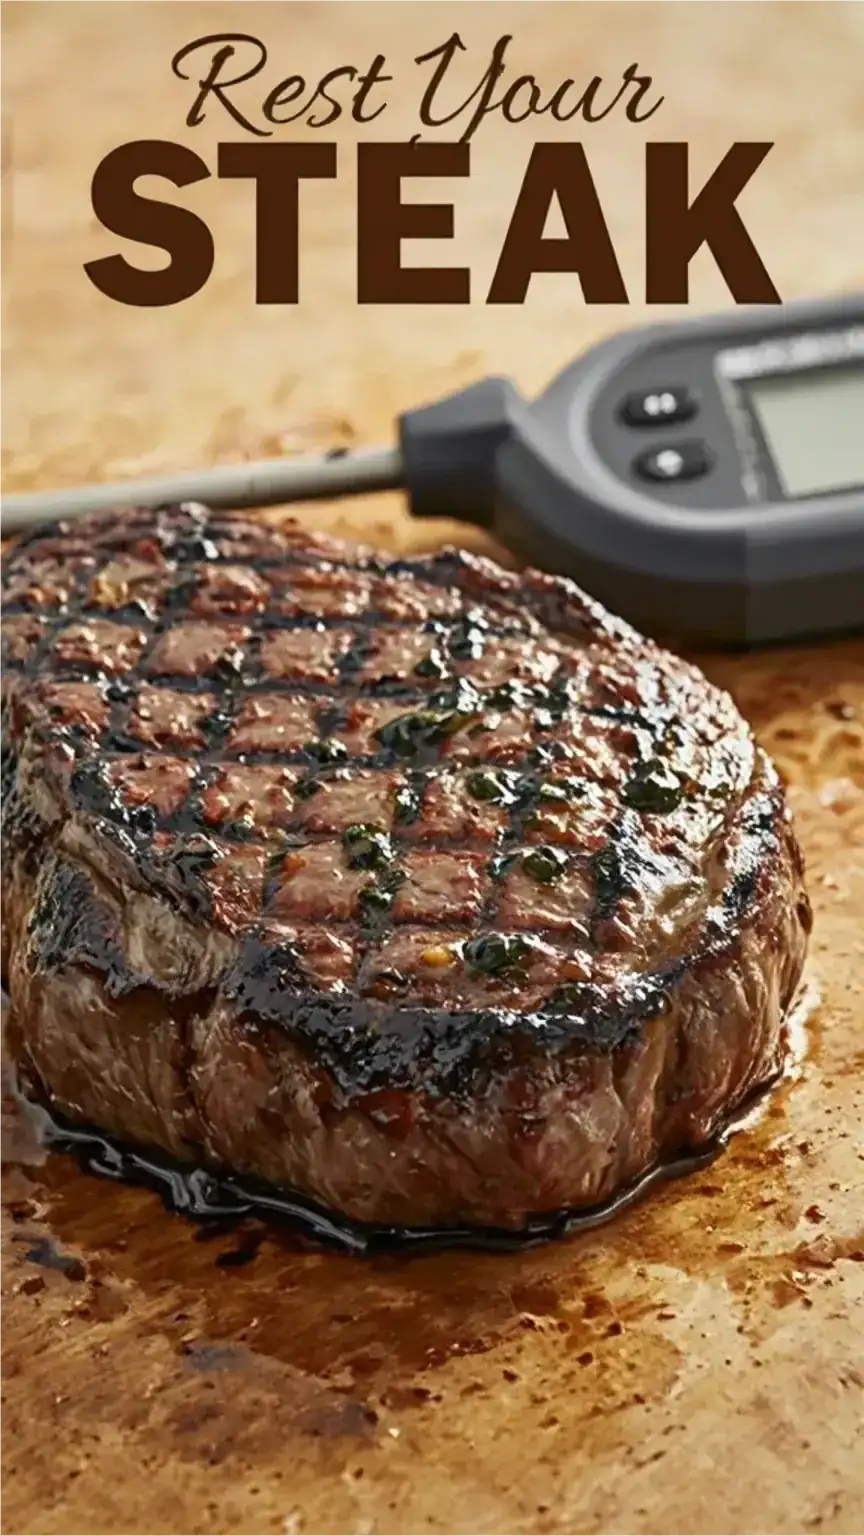
You’ve battled the heat, you’ve achieved your desired temperature, and now you’re staring at a perfectly cooked steak. But wait, don’t slice it just yet! This is arguably the most crucial step for ensuring a succulent, juicy steak: letting it rest. Once the steak is cooked to your liking, remove it from the grill and transfer it to a clean cutting board or plate. Tent it loosely with aluminum foil. This resting period, typically 5-10 minutes for steaks of this thickness, allows the juices that have been pushed to the center during cooking to redistribute throughout the meat. Consequently, when you slice into it, you’ll experience maximum moisture and tenderness with every bite, rather than all the delicious juices running onto your plate.
Step 6: Slice and Serve – The Grand Finale
The final, satisfying step is to slice the steak against the grain and serve it with your favorite accompaniments. Slicing against the grain is vital because it shortens the muscle fibers, making the steak more tender and easier to chew. Look for the direction in which the muscle fibers are running and cut perpendicular to them.
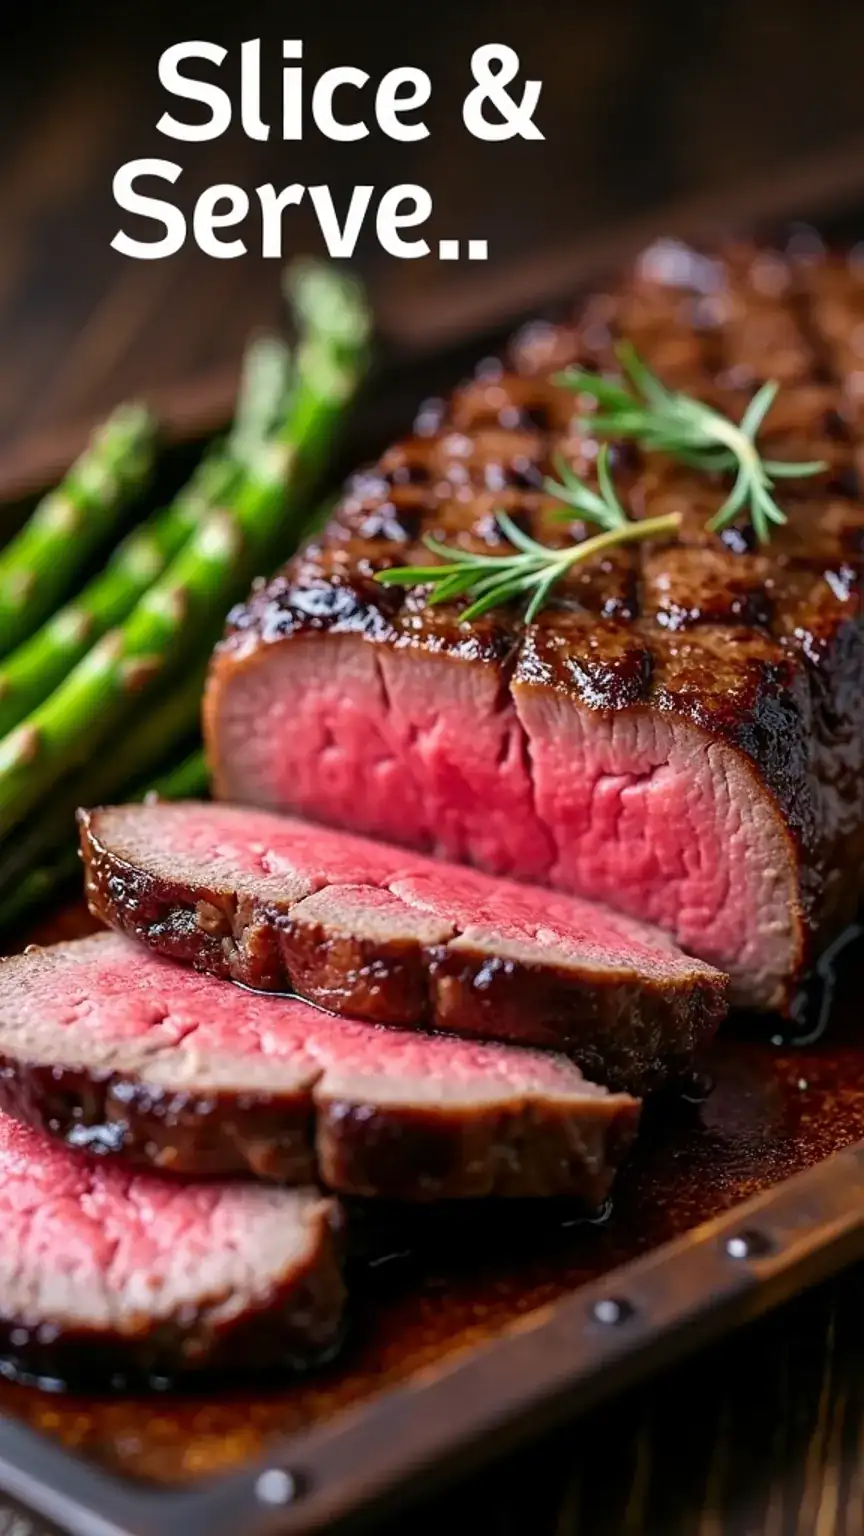
I highly recommend pairing your perfectly grilled steak with a couple of vibrant grilled vegetables, like tender asparagus spears lightly charred, or colorful bell peppers that have softened and caramelized on the grill. A simple side salad or a baked potato also makes for a classic and satisfying meal. The aroma alone will have your guests singing your praises.
Advanced Tips and Tricks for the Grill Master
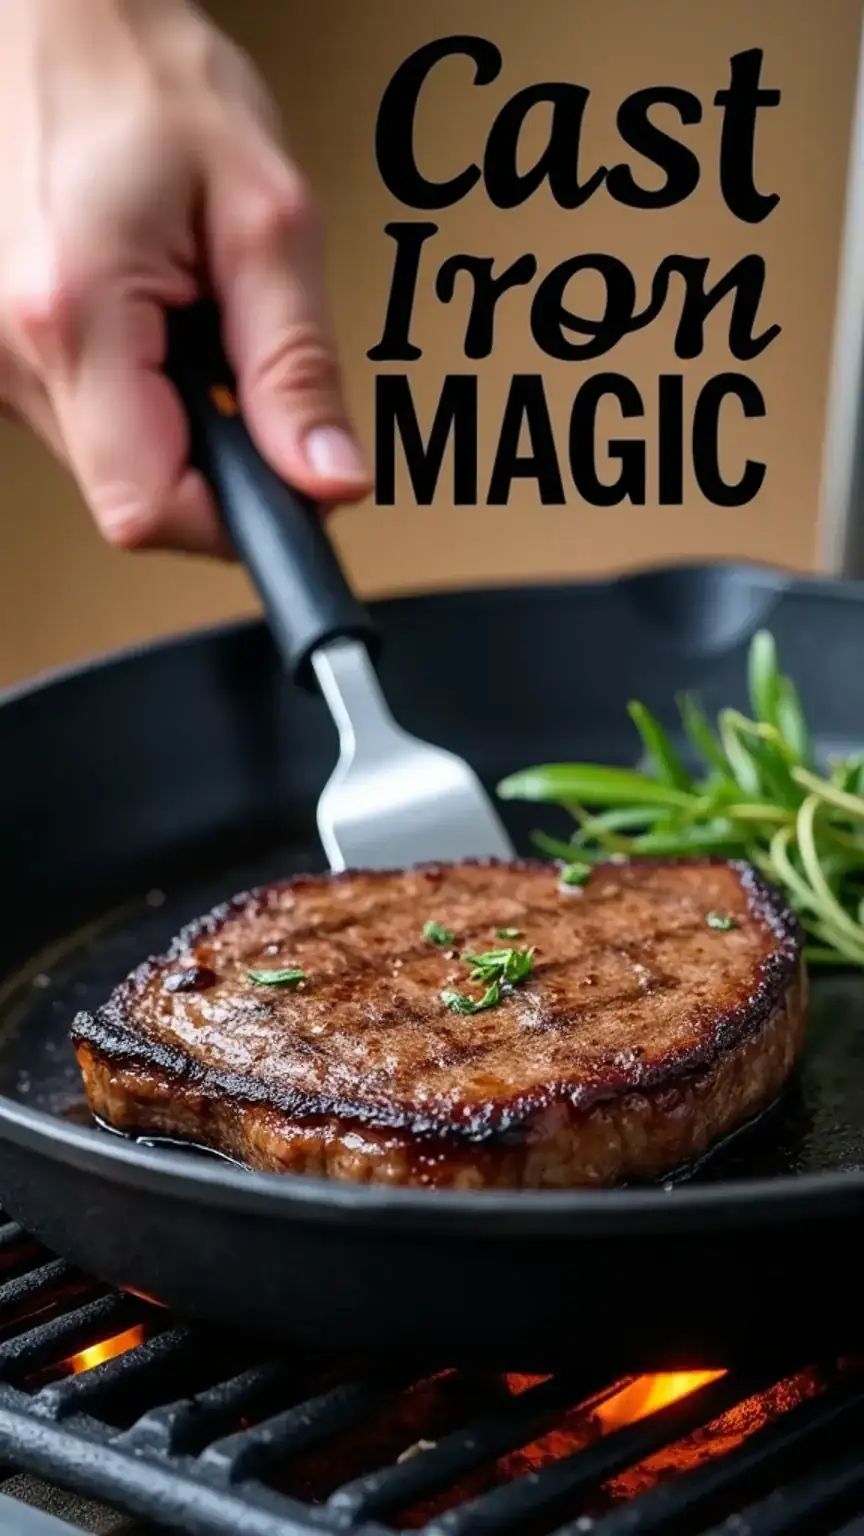
To truly master the art of grilling steak, consider these additional pro tips. For an exceptional crust and added flavor, consider using a cast-iron or stainless steel grill pan in conjunction with your grill. This allows for better heat retention and can create those beautiful grill marks. However, be mindful of flare-ups. A common mistake is pressing down on the steak with your spatula while it’s cooking. Resist this urge! Doing so squeezes out the precious juices, leading to a drier, less flavorful steak.
Furthermore, always ensure your grill grates are clean before you begin. Use a sturdy grill brush to remove any residue from previous cooks. This prevents sticking and ensures a clean sear. For those who enjoy experimenting, don’t hesitate to explore different seasonings and marinades. A simple garlic-herb marinade or a spicy chili rub can add exciting new dimensions to your steak.
Looking to level up your grill game beyond the basics? Check out these must-reads to sharpen your skills and fire up serious flavor:
– Sizzling Summer & Fall BBQ Recipes: 12 Essential Tips for a Smoky Success
– The Ultimate BBQ Rubs and Marinades Guide for Every Meat
– 5 Essential BBQ Tools Every Grill Master Needs
Each one’s packed with real tips, no fluff — because great grilling isn’t just about the meat, it’s about the mindset.
Elevating Your Steak Experience with Marinades and Rubs
While a perfectly seasoned steak with salt and pepper is fantastic, exploring marinades and rubs can add another layer of sophistication to your grilling repertoire.
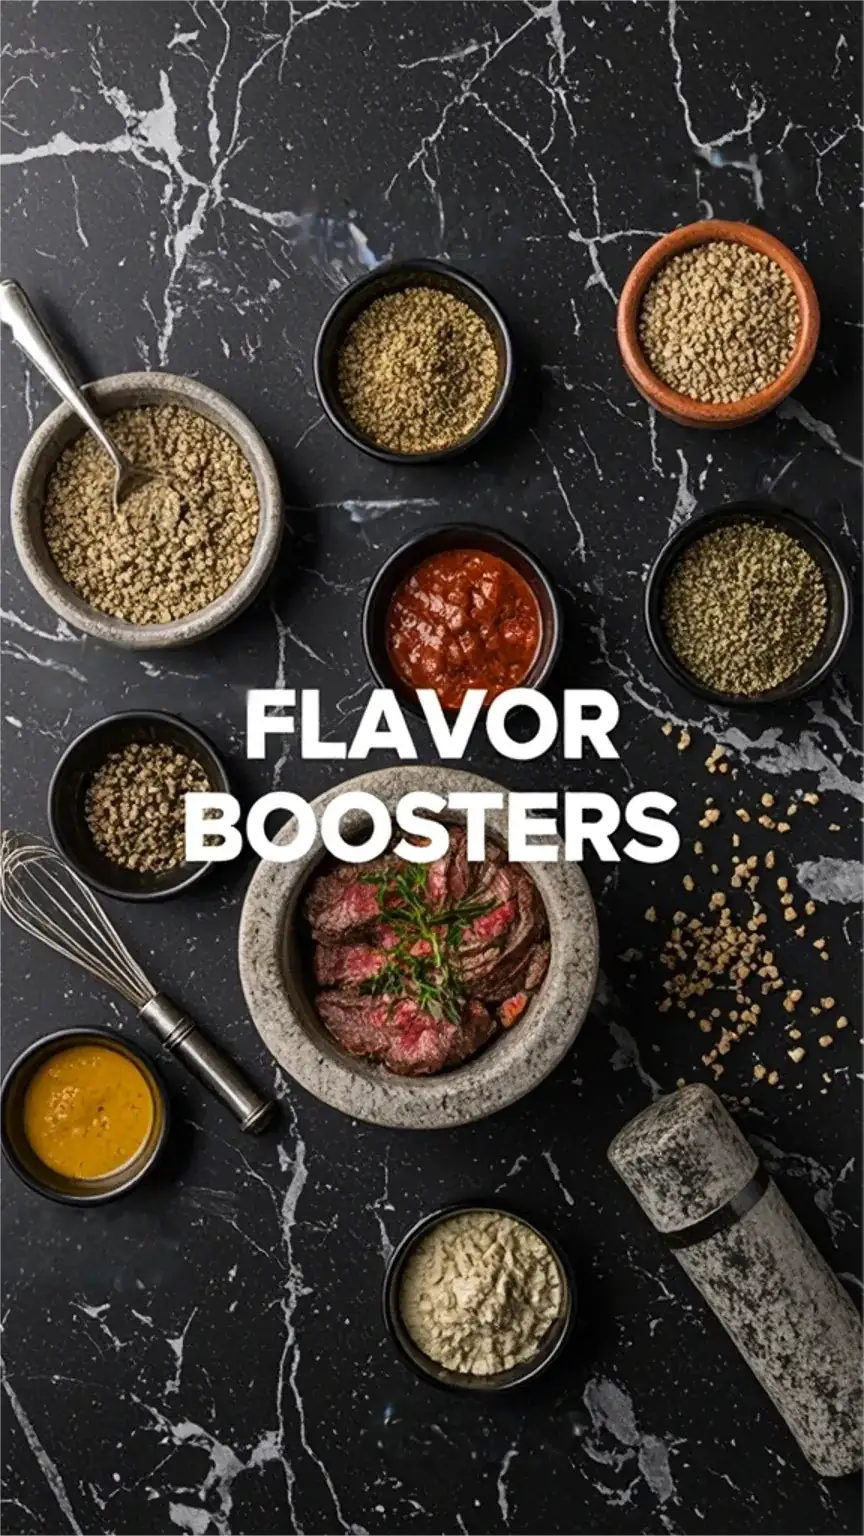
For instance, a classic marinade can include ingredients like olive oil, soy sauce, Worcestershire sauce, garlic, rosemary, and a touch of Dijon mustard. These flavors penetrate the meat, tenderizing it and infusing it with deliciousness. Similarly, dry rubs can create a fantastic crust and add complexity. Consider a blend of paprika, chili powder, brown sugar, garlic powder, onion powder, and cumin for a smoky, slightly sweet, and spicy kick. Remember to marinate for at least 30 minutes, or up to a few hours for thicker cuts, but avoid marinating for too long, especially with acidic ingredients, as this can make the meat mushy.
Understanding Doneness: The Science Behind the Perfect Steak
As mentioned earlier, using a meat thermometer is your best friend when it comes to achieving your desired level of steak doneness. However, it’s also helpful to have a general understanding of what those temperatures mean in terms of texture and appearance.
- Rare (120-125°F / 49-52°C): Cool red center. Very soft and tender.
- Medium-Rare (130-135°F / 54-57°C): Warm red center. Tender and juicy. This is often considered the ideal for many premium cuts.
- Medium (140-145°F / 60-63°C): Warm pink center. Firmer, but still juicy.
- Medium-Well (150-155°F / 65-68°C): Slightly pink center. Noticeably firmer.
- Well-Done (160°F+ / 71°C+): Little to no pink. Firm and less juicy.
Pro Tip: For an extra touch of elegance and flavor, consider finishing your steak with a compound butter made from softened butter mixed with herbs like parsley, chives, or rosemary, and a pinch of garlic. Place a slice on top of the hot steak as it rests; the butter will melt beautifully, adding richness and aroma.
Conclusion: Your Grill Master Status Awaits
Grilling steak doesn’t have to be an intimidating endeavor. With these simple yet effective steps and insider tips, you’ll be well on your way to mastering the art of grill-roasted perfection. From selecting the right cut to understanding the importance of resting, each stage plays a vital role in delivering a steak that’s not only cooked to perfection but bursting with flavor and tenderness. So go ahead, fire up the grill, embrace the process, and get ready to impress your friends and family with your newfound grilling prowess. Once you’ve got the steak down pat, you might want to consider how to orchestrate a truly memorable outdoor culinary event, which is why learning how to host the ultimate backyard BBQ like a pro is the next logical step. Your backyard gatherings will never be the same.
Ready to step up as the neighborhood grill master? Start by nailing the techniques here — then take it further with our handpicked guides above. And when the steaks are perfect? Tag your #GrillMasterUpgrade moments. We’ll be watching.